Single Sign-On (SSO) allows your users to access Nitro's products by authenticating through your Identity Provider (IdP). Nitro supports SSO with any SAML-2.0 compliant IdP. See "Step-by-step instructions for various IdPs” for IDP-specific instructions.
Note: This feature is only available for Enterprise customers.
Prerequisites:
- Your account must have a verified domain to set up and enable SSO. Visit this article for instructions on verifying your domain.
- You will need the following information from your IdP:
- Sign In URL
- X.509 Signing Certificate
Set up SAML SSO
- Login to the Nitro Admin Portal
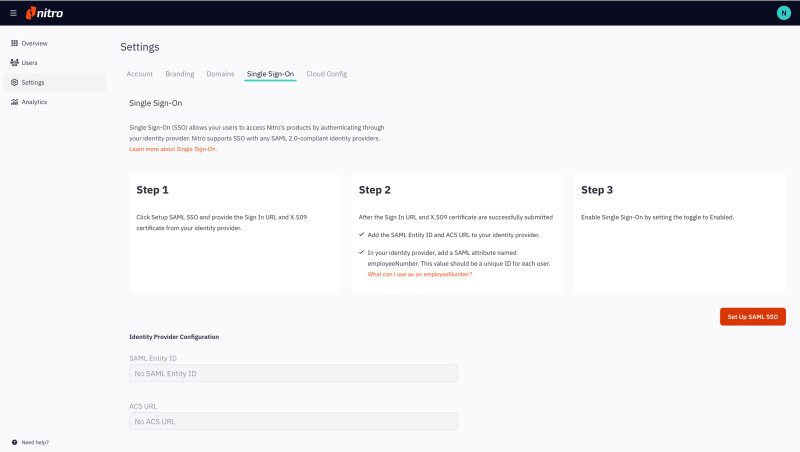
- Select Settings in the left navigation pane and navigate to the Single Sign-On tab
- Click the Setup SAML SSO button.

- Enter your IdP's SignInURL and upload the x.509 Signing Certificate from your IdP. The x.509 Signing Certificate should be base 64 encoded and in a .ceror .pemformat.

- When these have been submitted successfully, you will be provided with the SAMLEntity ID and ACS URL. Make sure that you add both ACS URLs to your IdP.
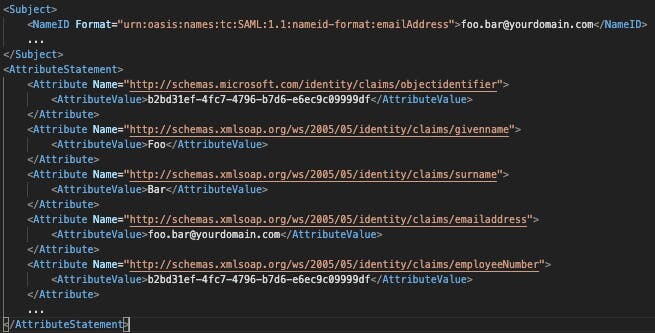
Nitro requires the SAML assertion to contain NameID, email, given_name and family_name of a user:
- NameID must be set to email address.
- Please note the UI for adding custom attributes will vary depending on the identity provider in use. See example assertions from Okta, Azure AD below.
Enable SSO
After completing the SAML SSO setup, check Enable Single Sign-On
Testing SSO
Toggle Enable Single Sign-On to Disabled.
- Assign your test user permission to the Nitro application in your IdP
- Test IdP initiated login from your IdP’s application launch page
- Test SP initiated login from an incognito window
- Navigate to https://sso.gonitro.com and enter the test users username
Note: If you lose your active admin session while testing SSO login and are unable to log back in please contact customer support to disable the SSO configuration for you.
Disable SSO
Uncheck Enable Single Sign-On
Note: When SSO is disabled, users will need to log in with their Nitro account username and password.
Removing an IdP Configuration
To remove the IdP configuration, click the Remove Configuration button.
Note: Removing an IdP configuration will disable SSO for your account.
Step-by-step instructions for various IdPs:
Example Assertion from Okta:

Example Assertion from Azure AD: