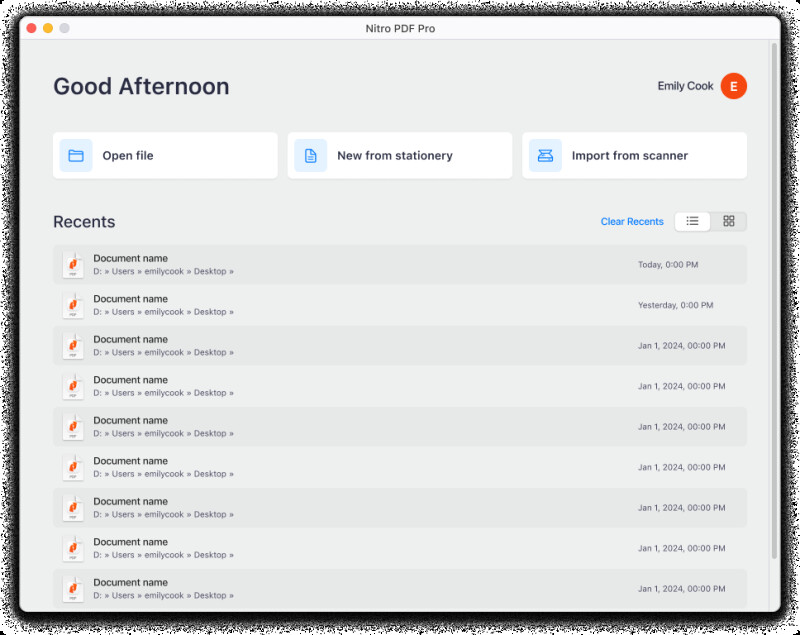
The Home screen makes it easy for you to open a new documents, create a document from predesigned stationery, or import a document from the scanner upon launching the application. Additionally, you can access a list of recently opened documents to quickly resume your work.

Open file
You can open a PDF document saved on your Mac or access documents in iCloud or a third-party document service using the “Open file” option.
1. From the Home screen, choose “Open file.”
2. The File > Open window will launch. (This is similar to the standard File > Open option available on native Mac apps).
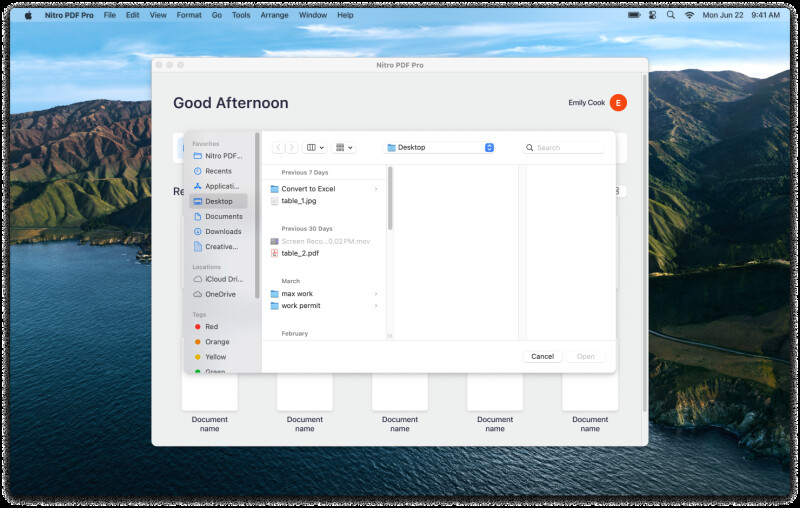
3. Find and select from a list of your documents. (Hold down the Shift key and click to select multiple files).
4. After selecting your document(s), click “Open” to open the documents for editing.
Learn more about Opening PDF files here: Opening PDF Files
New from stationery
You can create a new one page PDF document and select from predesigned stationery using the “New from stationery” option.
1. From the Home screen, choose “New from stationery.”
2. The Stationery window will launch. (This is similar to the File > New > From Stationery option).

3. Choose a page orientation and page design from the “New From Stationery” window.
4. After selecting your orientation and design, click “Choose” to open the document for editing.
Learn more about Creating Blank PDFs here: Creating Blank PDFs
Import from scanner
You can import documents from your scanner to open in Nitro PDF Pro by using the “Import from scanner” option.
- From the Home screen, choose “Import from scanner.”
- The Scan window will launch. (This is similar to the File > Import from Scanner… option).
- Select your scan settings and click “Scan” to open the document for editing in Nitro PDF Pro.
Learn more about Creating PDFs from Scans here: Creating PDFs from Scans
Recents
You can quickly access from a list of recently opened or edited documents available from the Home screen. This list is similar to the documents available from “Open Recents” from the File menu. Select from the List view or the Thumbnail view. The date and time available in the List view reflects the date and time on your system. Here is how your list of documents would appear in Thumbnail view:
To open a file or multiple files from Recents:
- From the Home screen, under “Recents” select a single file. (Hold down Shift to select multiple files).
- Double-click to open the files for editing. (Alternatively, Control+click i.e. right click on the selected file(s) to open the files for editing).
To delete a file or multiple files from Recents:
1. From the Home screen, under “Recents” select a single file. (Hold down Shift to select multiple files).
2. Control+click i.e. right click on the selected file(s).
3. From the context menu choose “Remove [x] files from recents.”To open a file or multiple files from Recents:

4. A dialog will appear asking you to confirm the action. Click “Remove from recents” to proceed.

If you do not want any recent documents listed in this screen, choose “Clear results.” This will remove your list of recently opened and edited documents in the Home screen.
Enable / Disable Home Screen
Users will have the option to enable or disable the Home Screen upon launch under Settings > General. The Home screen will open upon launching the application if you have the “Show Home Screen on launch” setting enabled / checked.
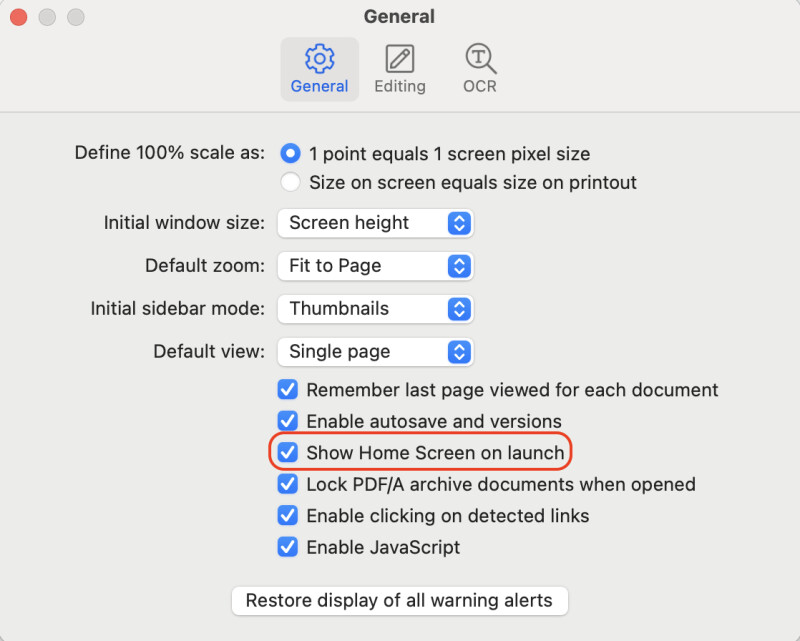
If you disable / uncheck the option to “Show Home Screen on launch” the app will default to the standard native behavior where you can select documents for editing from the File > Open menu.
Additionally, if you disable Home screen on launch, you can still access a list of recent documents. To access your list of recent documents, choose File > Open Recent > “View all recents.”
Learn more about User Preferences here: User Preferences