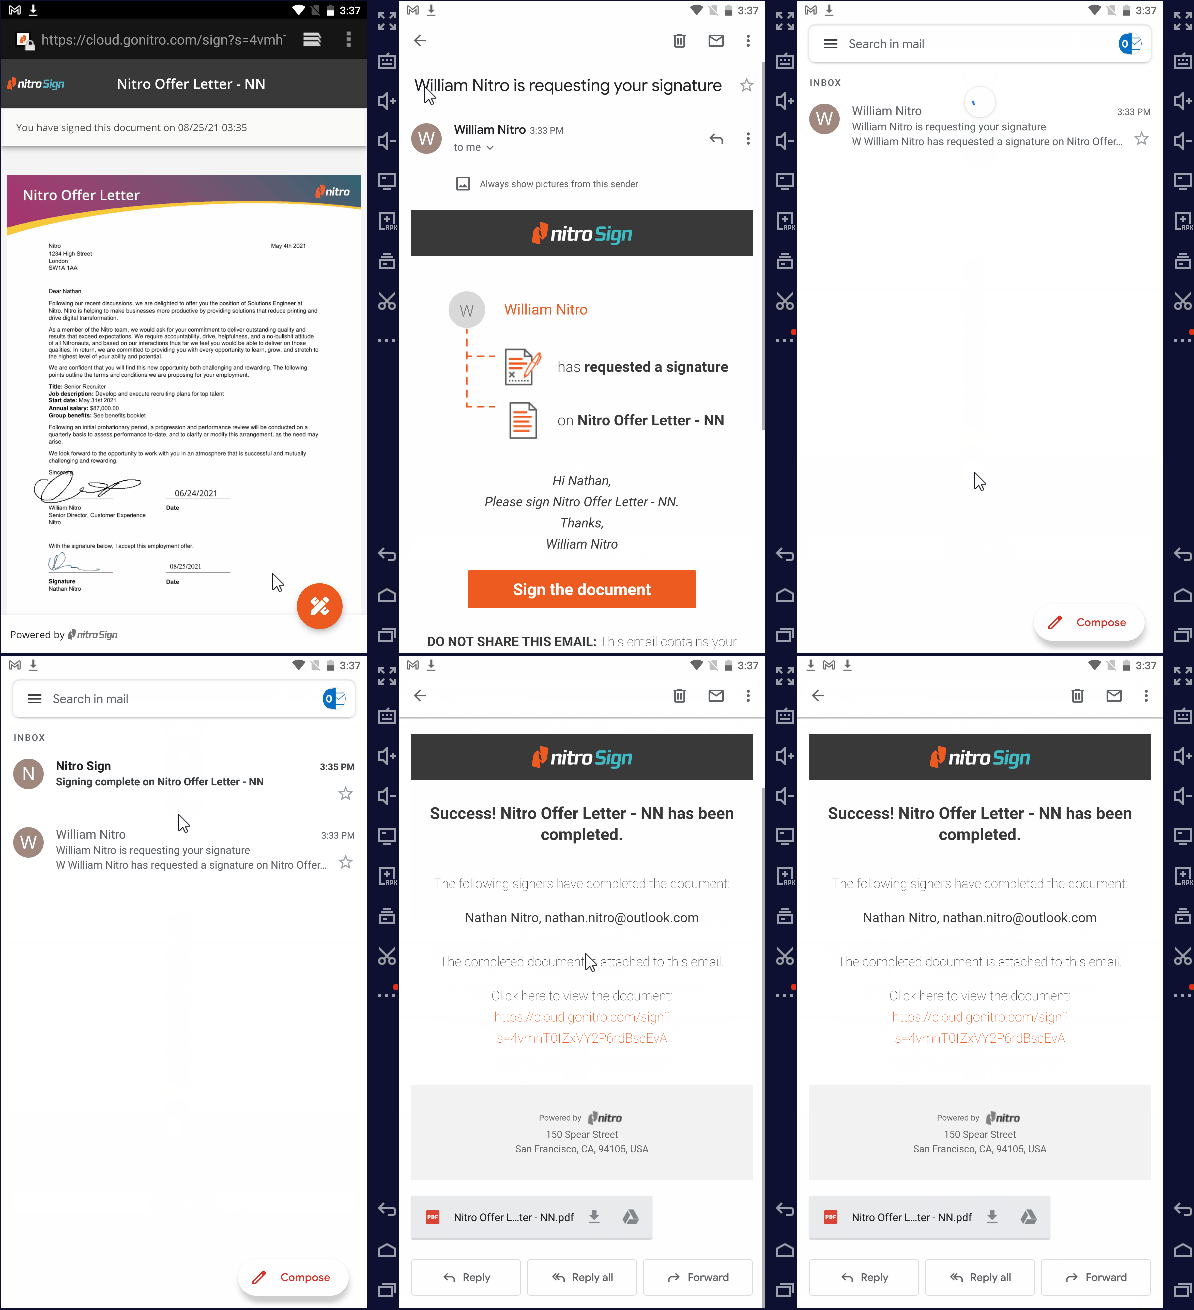
NOTE: You do not need a Nitro Sign account in order to complete a request.
Using Nitro Sign from your Desktop or PC:
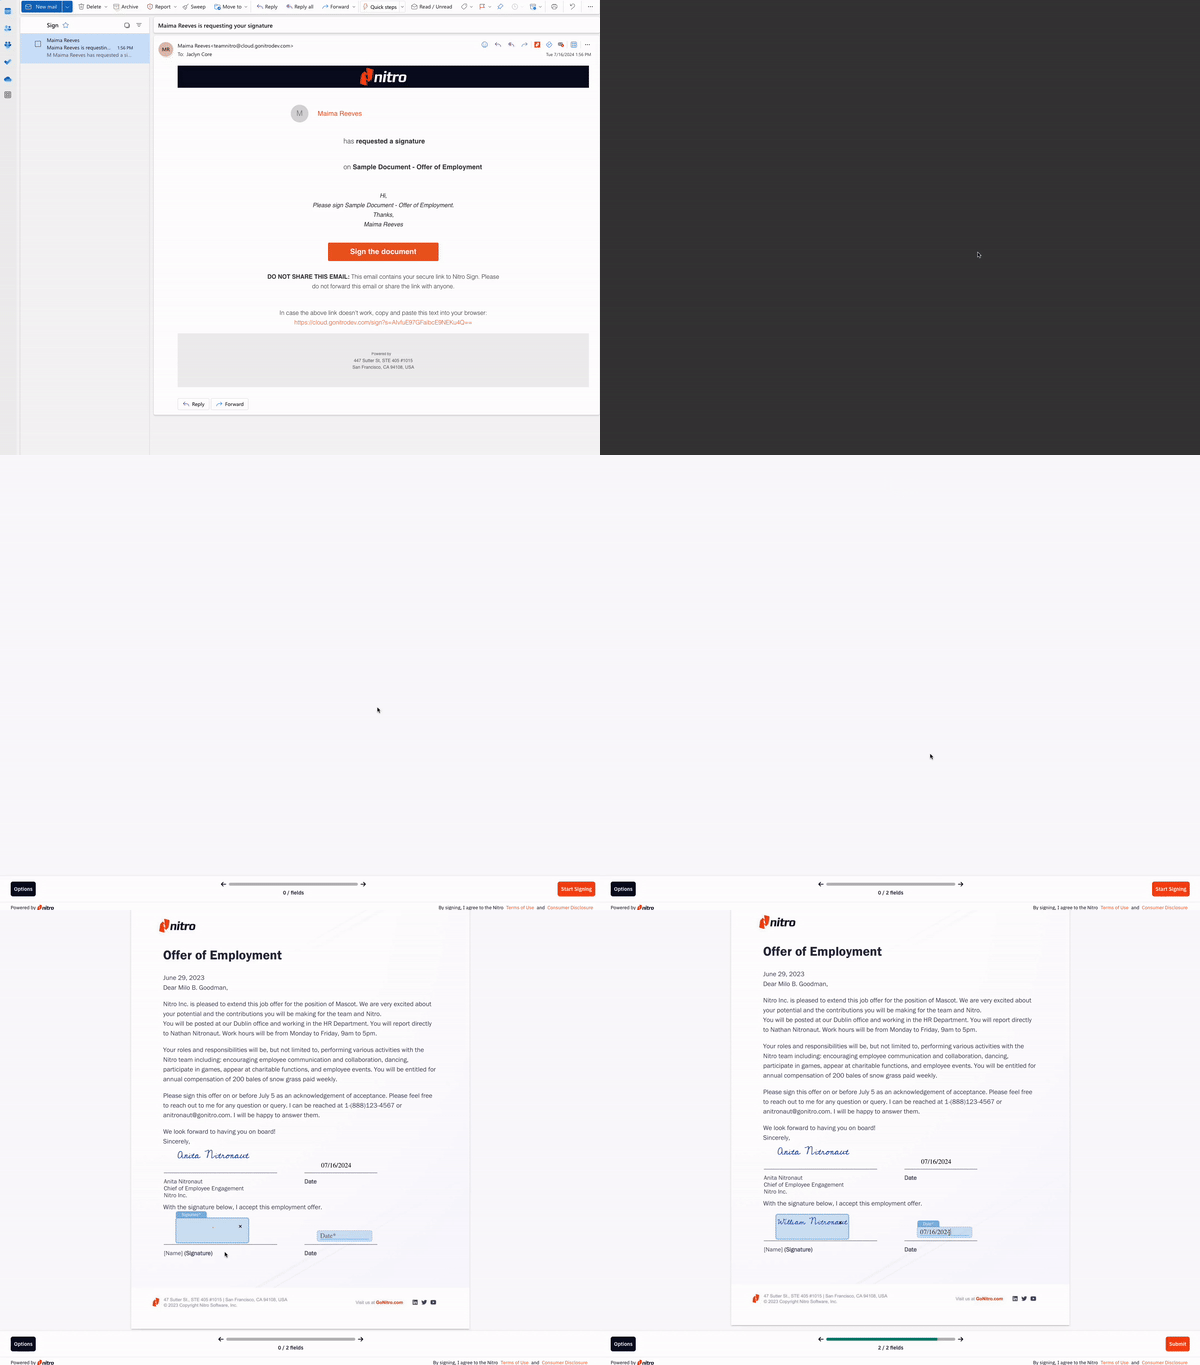
1. Within your email application, click the Sign the Document link within the email.
2. Click the right arrow, or Start Signing to begin filling out the information fields.
3. Signatures can be created by Drawing, Typing or Uploading an image of your signature.
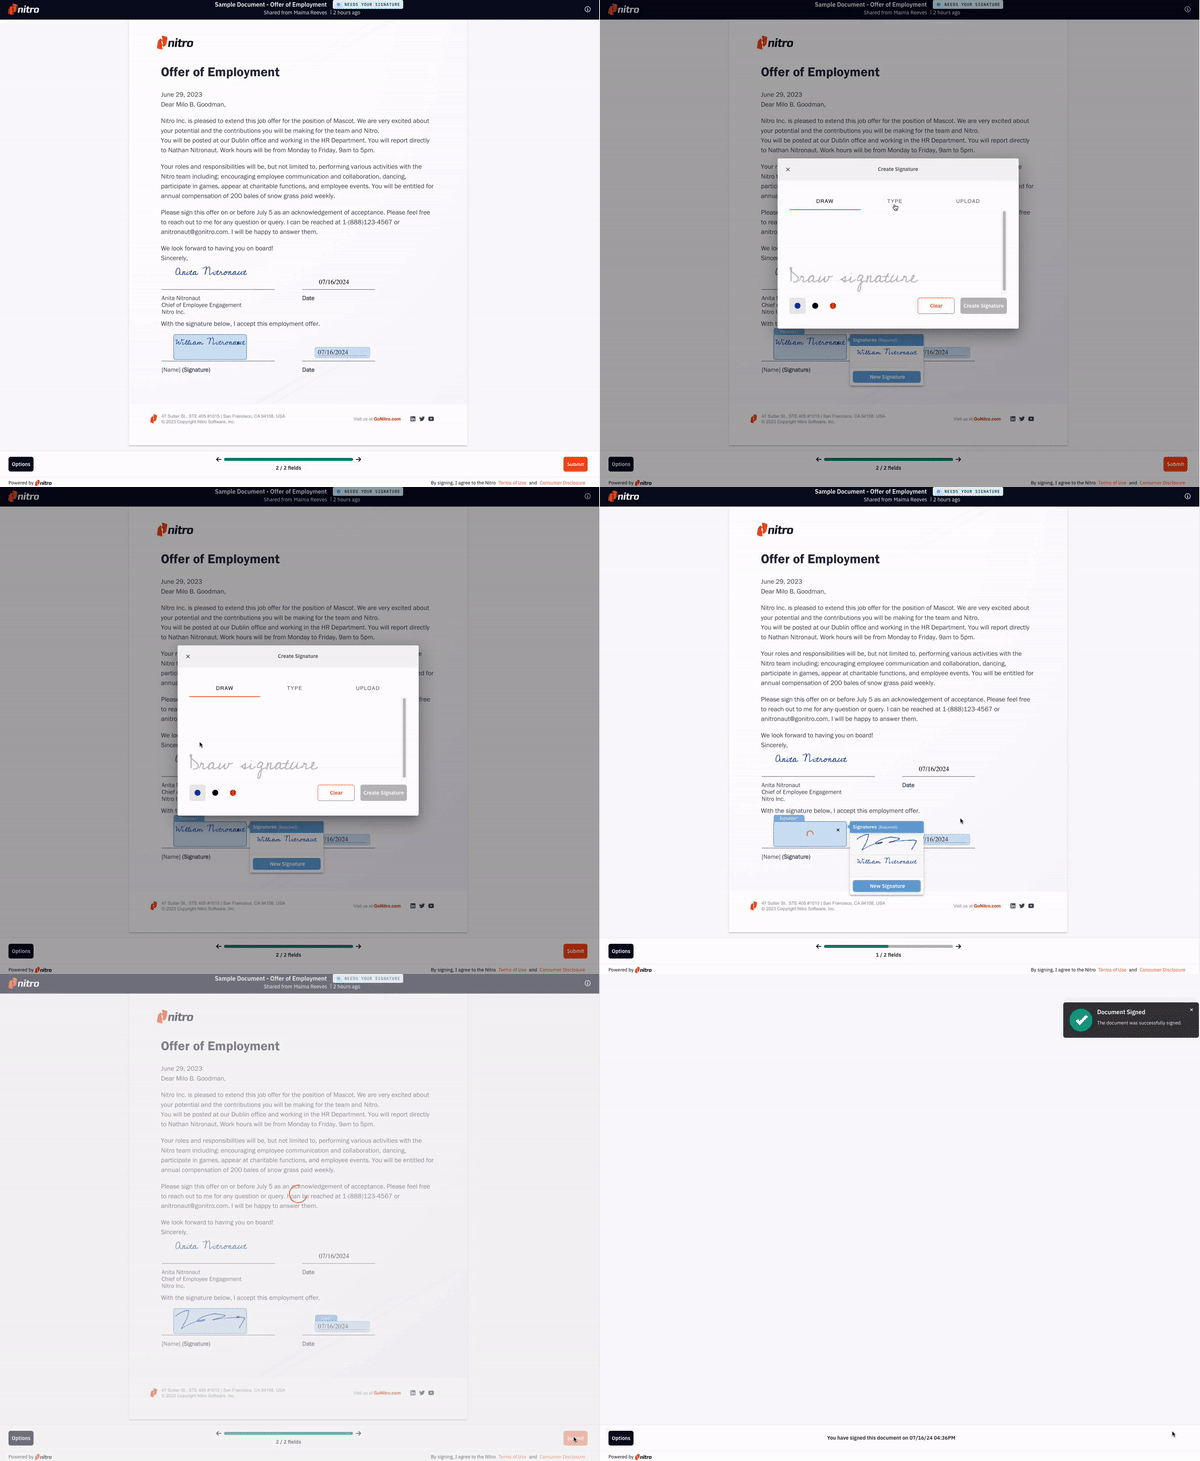
TIP: An indicator at the bottom will tell you how many fields need to be completed in order to complete the document. Click the Right Arrow to immediately move to the next information field required. You may send the document back if it’s incomplete, or requires further review from the sender by clicking Options.
4. Once all information fields are filled, you are able to click Submit. A notification to the author will be notified via email, and you will receive a copy of the document in your email.
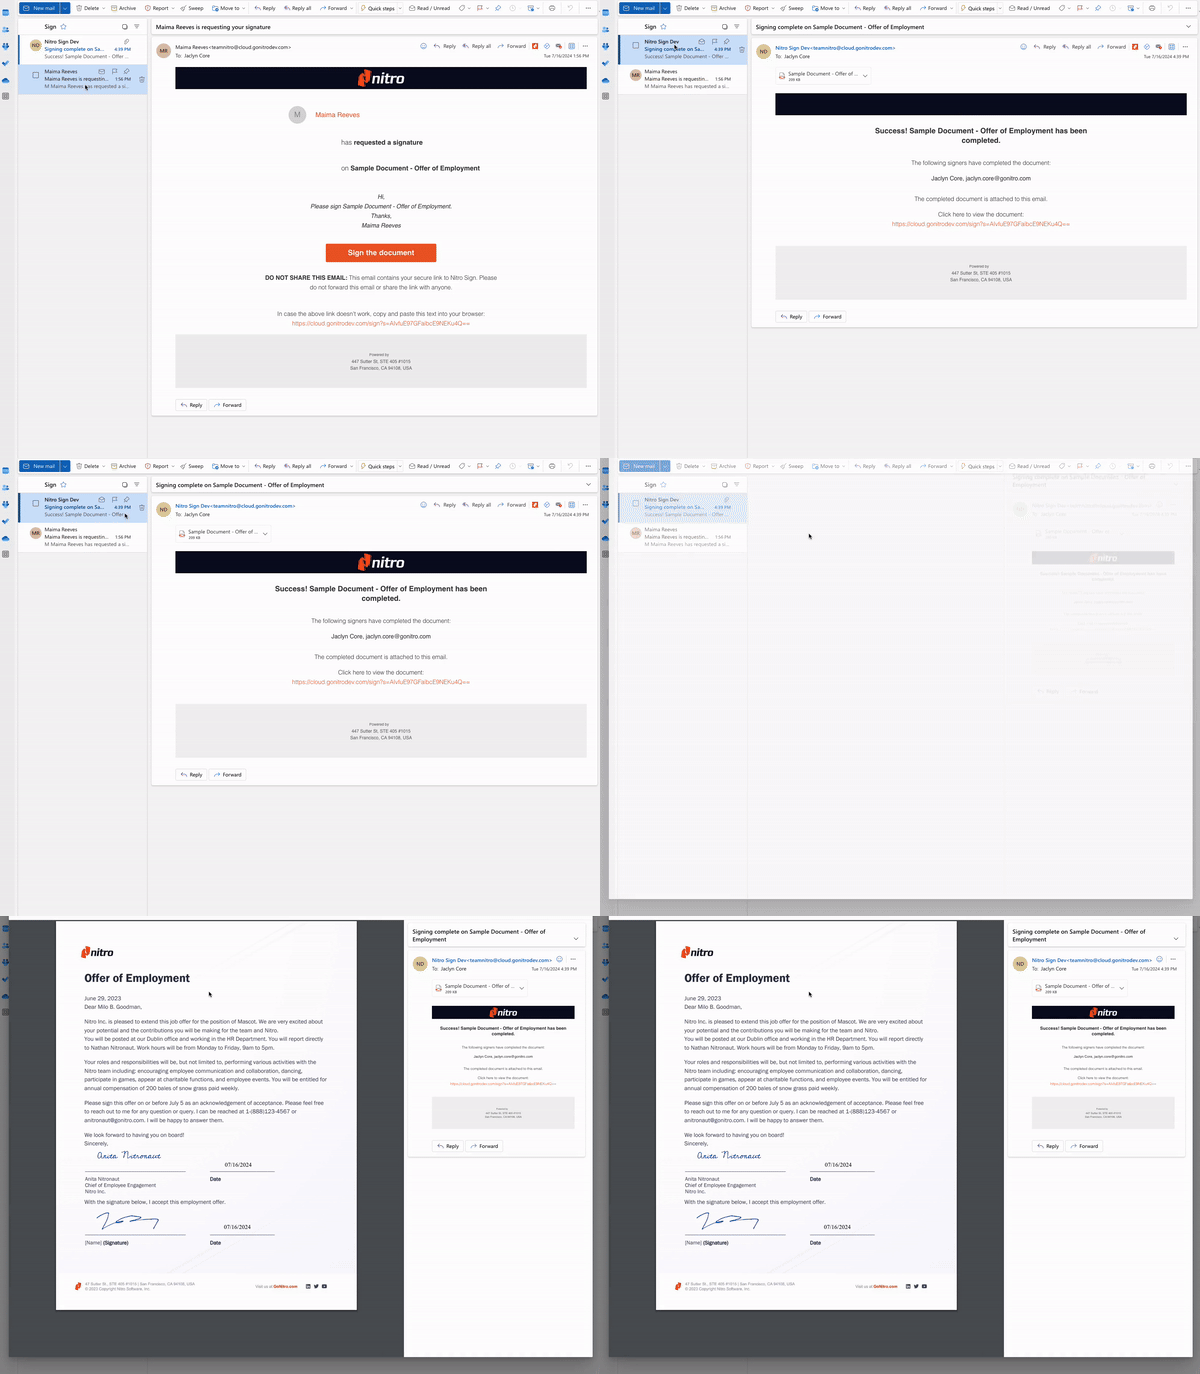
NOTE: A Nitro Sign account is not required in order to complete requests from Nitro Sign.
Using Nitro Sign from a mobile or tablet device:
1. Within your email application, click the Sign the Document link within the email.
2. Click Start to begin filling out the information fields.
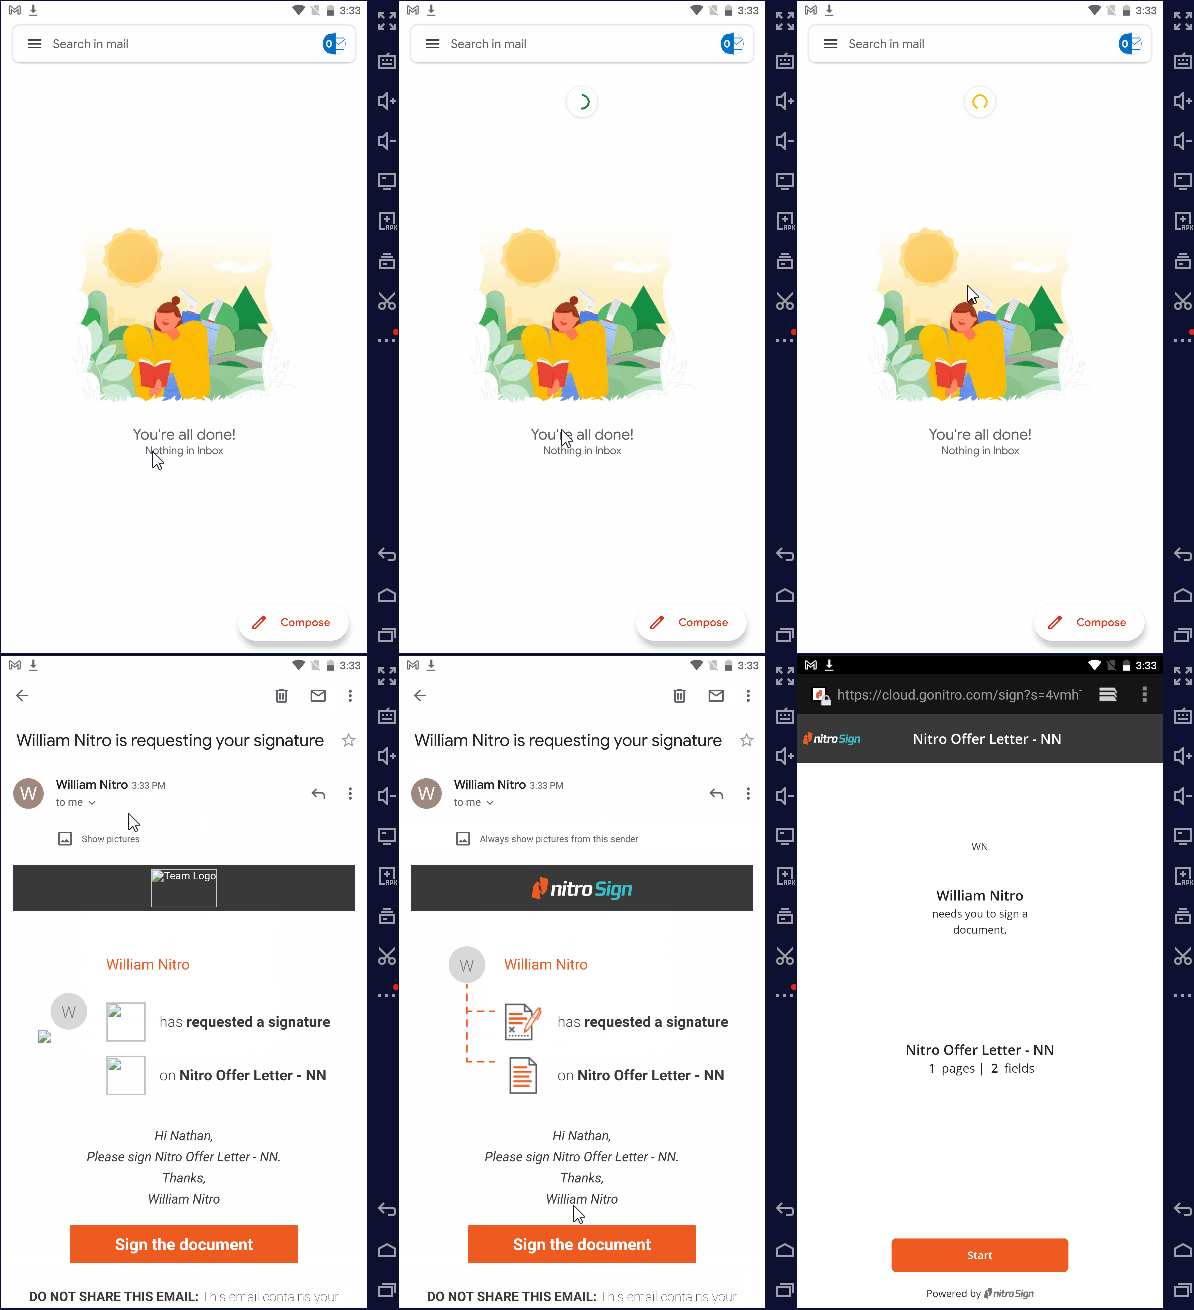
3. Click the highlighted fields, or the Left and Right Arrows to move to the next field which requires information.
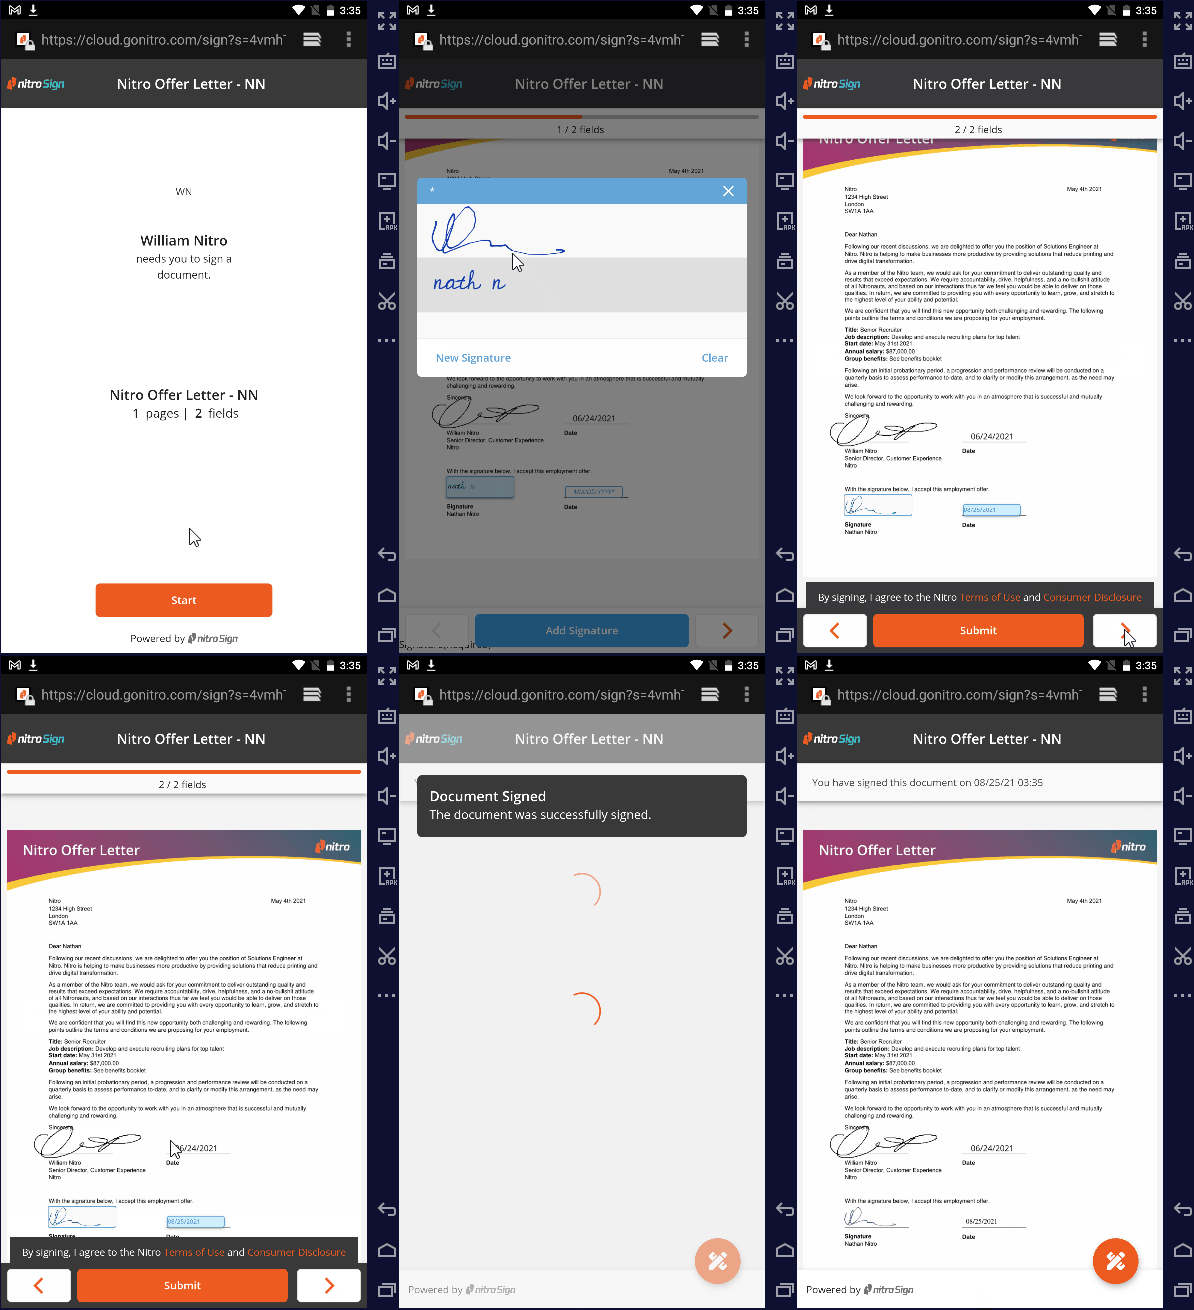
TIP: An indicator at the bottom will tell you how many fields need to be completed in order to complete the document. Click the Right Arrow to immediately move to the next information field required.
4. Once all information fields are filled, you are able to click Submit. A notification to the author will be notified via email, and you will receive a copy of the document in your email.
